Is Coffee Leaf Tea Grassy? The Side-Shoot Tea That Made My Wife Go "Ugh" — and How I Fixed It
I pan-roasted fresh coffee tree side shoots to make coffee leaf tea. After a grassy first attempt, I followed advice from Goto Coffee Farm, adjusted the roast, removed the stems, and changed the steeping time until it became genuinely drinkable.
Table of Contents
- How it started: Goto-san told me it could be made into tea
- Prep: washed and split into two batches
- Attempt 1: roasting it like hojicha, more or less
- Is a light roast the cause of the grassiness? Reporting back to Goto-san
- Attempt 2: re-roasting
- Attempt 3: stems removed, leaves only
- Summary of all three attempts
- The finished tea, and my wife's verdict
- What happens if you dry the leaves first? (To be tested next)
- Tools used
- Final thoughts
- Related reading (growing and using a coffee tree, series)
I’d heard you could make tea from coffee leaves, so I tried it. The first attempt earned a wry “ugh” from my wife. It still had a grassy edge to it — not something I could confidently offer anyone else, myself included.
From there, I reported the results to Goto-san at Goto Coffee Farm and sent him some photos. He suggested that I roast the leaves a little longer. I adjusted the roast, the prep, and the steeping time. Eventually, my wife told me it had “a sweet aroma, kind of like Taiwanese tea, and it’s good.”
This article is the honest record of that process — from “ugh” to “good” — failures, numbers, and all. If you’ve been wondering whether coffee leaf tea is actually drinkable, or worried it might taste too grassy, I hope this gives you a real answer.
How it started: Goto-san told me it could be made into tea
Growing a coffee tree means pruning and pinching back side shoots fairly regularly — the young new growth that appears from the nodes of the coffee tree. Goto-san from Goto Coffee Farm had mentioned that these shoots could be turned into tea — pan-roasted over low heat. I’d already made cascara (tea from dried coffee cherry pulp) before, so I figured I’d give leaf tea a try too.
For what it’s worth, Goto-san also mentioned the shoots can be eaten tempura-style (I haven’t tried that yet, but it’s on the list). It’s interesting that the same side shoots can be enjoyed in more than one way.
He’d also told me beforehand that a light roast leans toward herbal tea, while a darker roast leans toward hojicha (roasted green tea). That said, I’d never actually had coffee leaf tea myself, so I had no idea what the “correct” flavor was supposed to be. As with the cascara, I decided to just make it, then ask Goto-san what he thought.
Green tea, hojicha, and black tea all come from the same plant, Camellia sinensis. Coffee leaves come from a completely different plant, but the basic idea — heat the leaves to remove moisture, then steep them in hot water — still applies. This time, with hojicha roughly in mind, I started by pan-roasting.
Short version: it wasn’t good on the first try. But adjusting the roast and prep step by step gradually got it closer to something actually drinkable. Here’s that process.
Note: Coffee leaf tea contains caffeine. Please be mindful if you’re sensitive to caffeine or trying to limit your intake. Also, I would avoid using leaves unless you know how they were grown and whether any pesticides or chemicals were used. In my case, these leaves came from a farm I know personally.
Prep: washed and split into two batches
I washed the harvested side shoots in water first. There was too much to fit in the pan at once, so I split them into two batches.
Attempt 1: roasting it like hojicha, more or less
I put one batch in the pan and heated it over low heat, stirring constantly.
My first impression: it felt like sautéing spinach with no oil. There was a lot of volume and a lot of moisture, so it took a while before things wilted down.
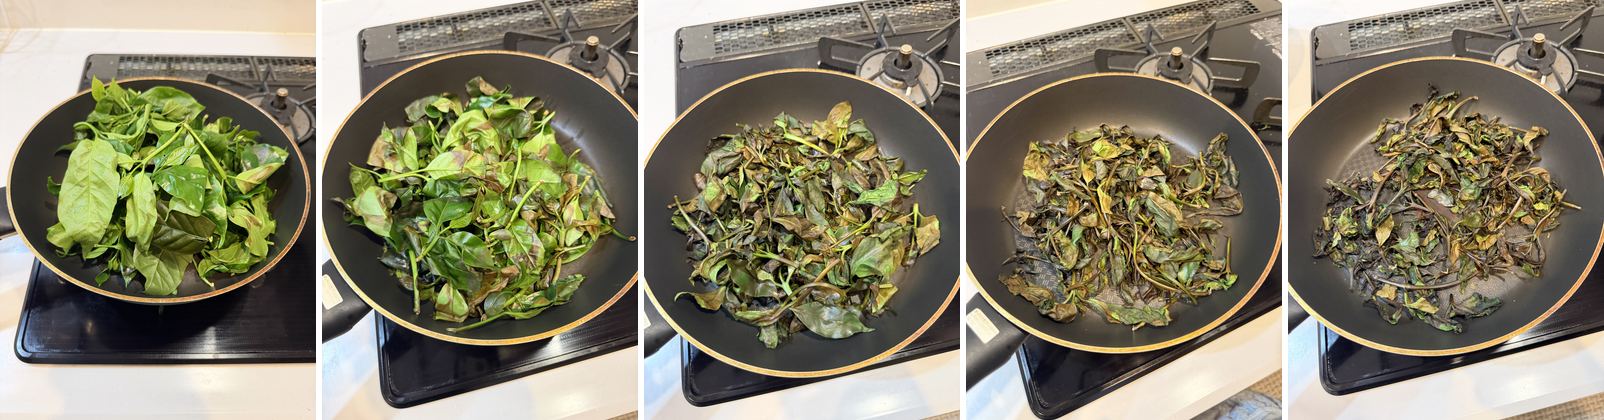
As I kept stirring, the volume gradually dropped. I was expecting something like the fragrant aroma of coffee roasting, but at this stage, no strong aroma really came through. I stopped after about 20 minutes. Some green remained here and there, but overall the volume had shrunk and most of the leaves had turned brown.
Weighing it out: 75g of raw side shoots became 39g roasted — roughly cut in half. Most of that weight, clearly, was water.
Brewing (attempt 1)
Following a hojicha-style ratio, I used 6g of leaves to 400ml of boiling water, steeped for 1 minute.
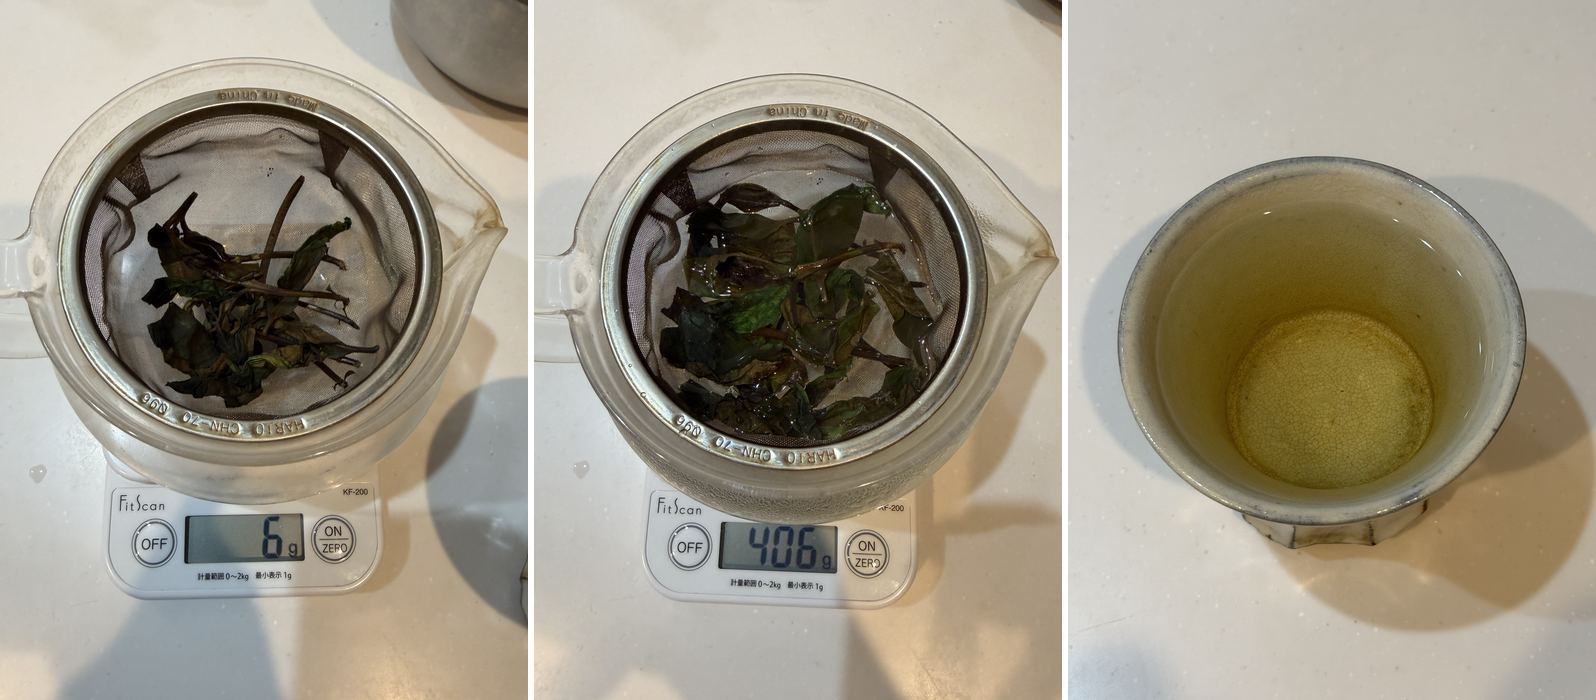
My wife’s reaction
Since she hadn’t reacted well to the cascara last time, I figured saying “coffee tea” would put her on guard, so I said nothing and just set it on the table as “I made tea.”
A while later, she took a sip. “Ugh.”
She didn’t say it was bad, but she gave a wry smile and didn’t go further. Tasting it myself, there was still a grassy, plant-like edge to it. Given what Goto-san had said about lighter roasts leaning herbal, this might just be what a “light-roast herbal tea” version of this tastes like — but either way, I put the leftover leaves in the refrigerator for later.
Is a light roast the cause of the grassiness? Reporting back to Goto-san
Goto-san has been generous with advice all along, so rather than just asking “what’s the right way to do this,” I emailed him to report what I’d actually tried. I told him honestly, with photos, that it tasted like herbal tea.
As with the cascara, I had no baseline for what the “correct” flavor should be. That’s exactly why I wanted to describe the result honestly and hear his take.
His advice: roasting it a bit longer would likely clear out the off-flavor and leave a cleaner-tasting coffee leaf tea. To soften the grassiness, roasting it more thoroughly seemed like the way to go. He’d also mentioned earlier that a darker roast leans toward hojicha, so with that direction in mind, I went back to roasting.
Attempt 2: re-roasting
I took the leaves I’d refrigerated from attempt 1 and roasted them again over low heat.
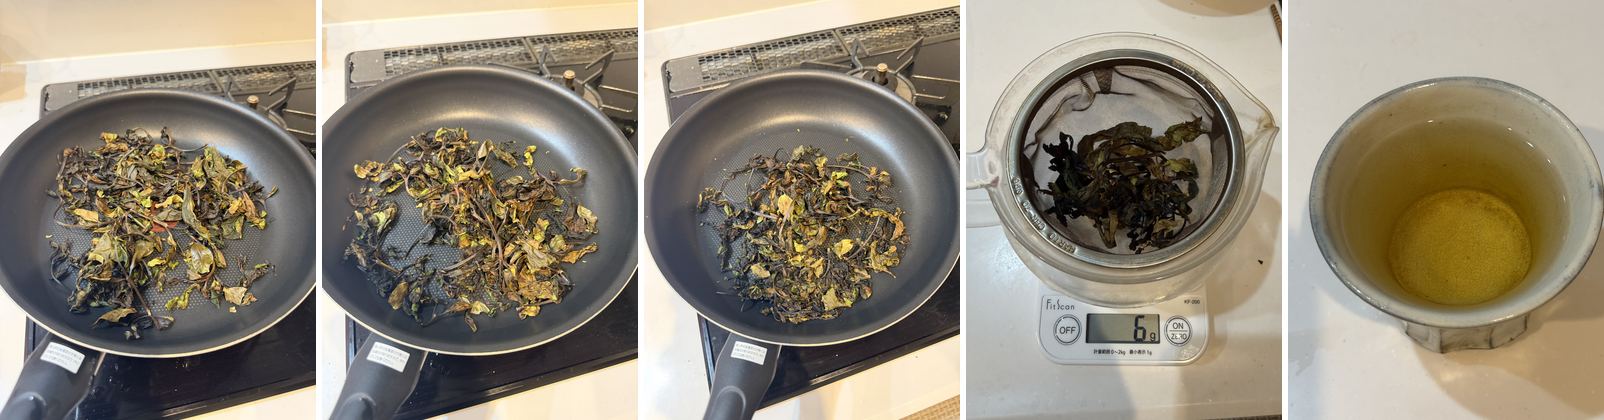
The green tint faded further, and the leaves dried out to the point of being crisp — snapping cleanly when I broke them with chopsticks.
Brewing (attempt 2)
Same conditions as before: 6g, 400ml, 1 minute.
Obviously, just setting it out silently again wasn’t going to work a second time, so I told her, “It’s different from last time,” and convinced her to try it. Her response:
“This is easier to drink than last time. Like the fifth steep of Taiwanese tea.”
I’ll admit I’m not well-versed in Taiwanese tea and my first thought was “you steep it five times?” — but the gist was: like tea that’s been re-steeped many times, it had aroma but not much flavor left. An improvement, but now a new problem had appeared: it was too weak.
Attempt 3: stems removed, leaves only
At this point I had a hypothesis:
- The moisture content of the leaves affects the ideal roasting time.
- Stems are thicker and take longer to roast than the leaves, so mixing them in probably causes uneven roasting.
So for the second batch I’d set aside, I stripped out the stems and used leaves only, tearing the larger leaves by hand into roughly uniform sizes before putting them in the pan.
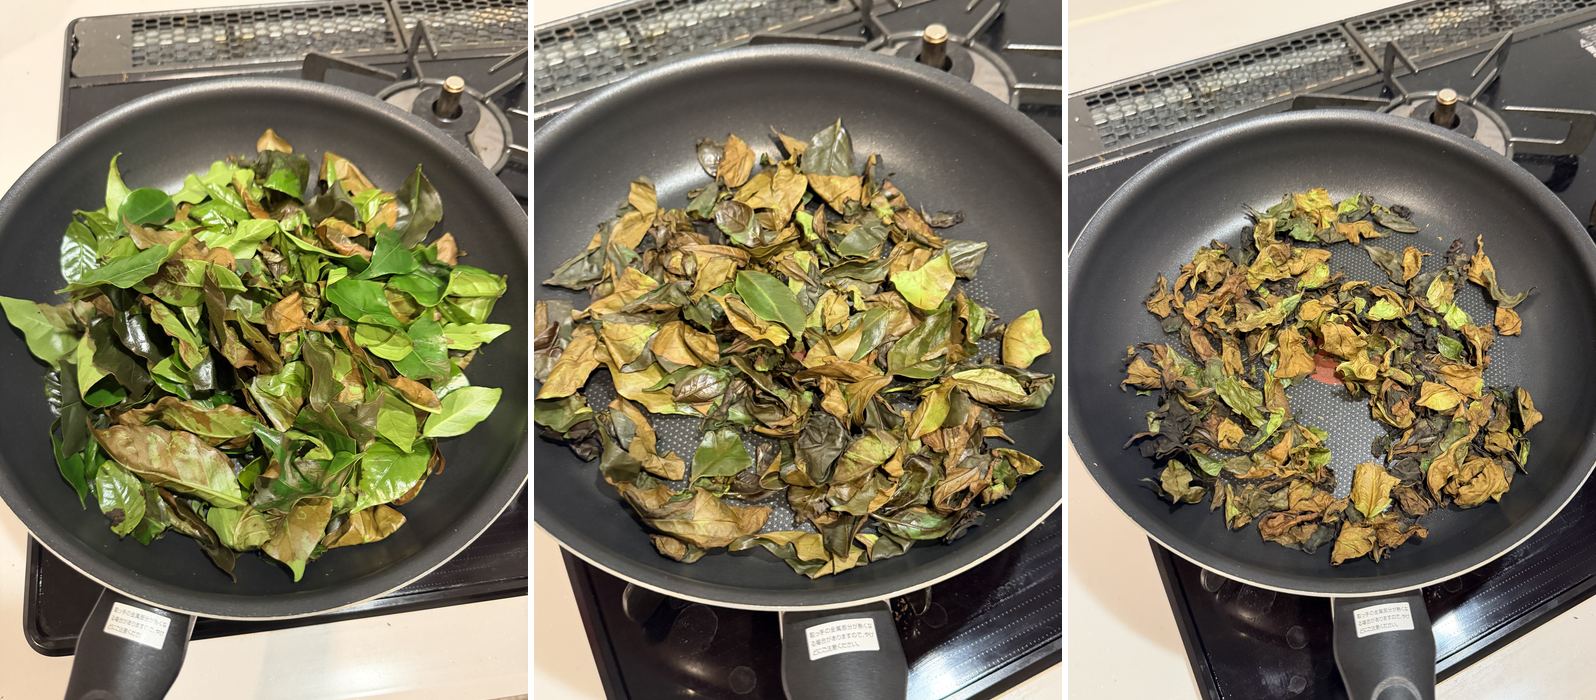
As I roasted them, the leaves became crisp after about 15 minutes. By around 25 minutes, they had become brittle and broken into much smaller pieces, so I stopped there.
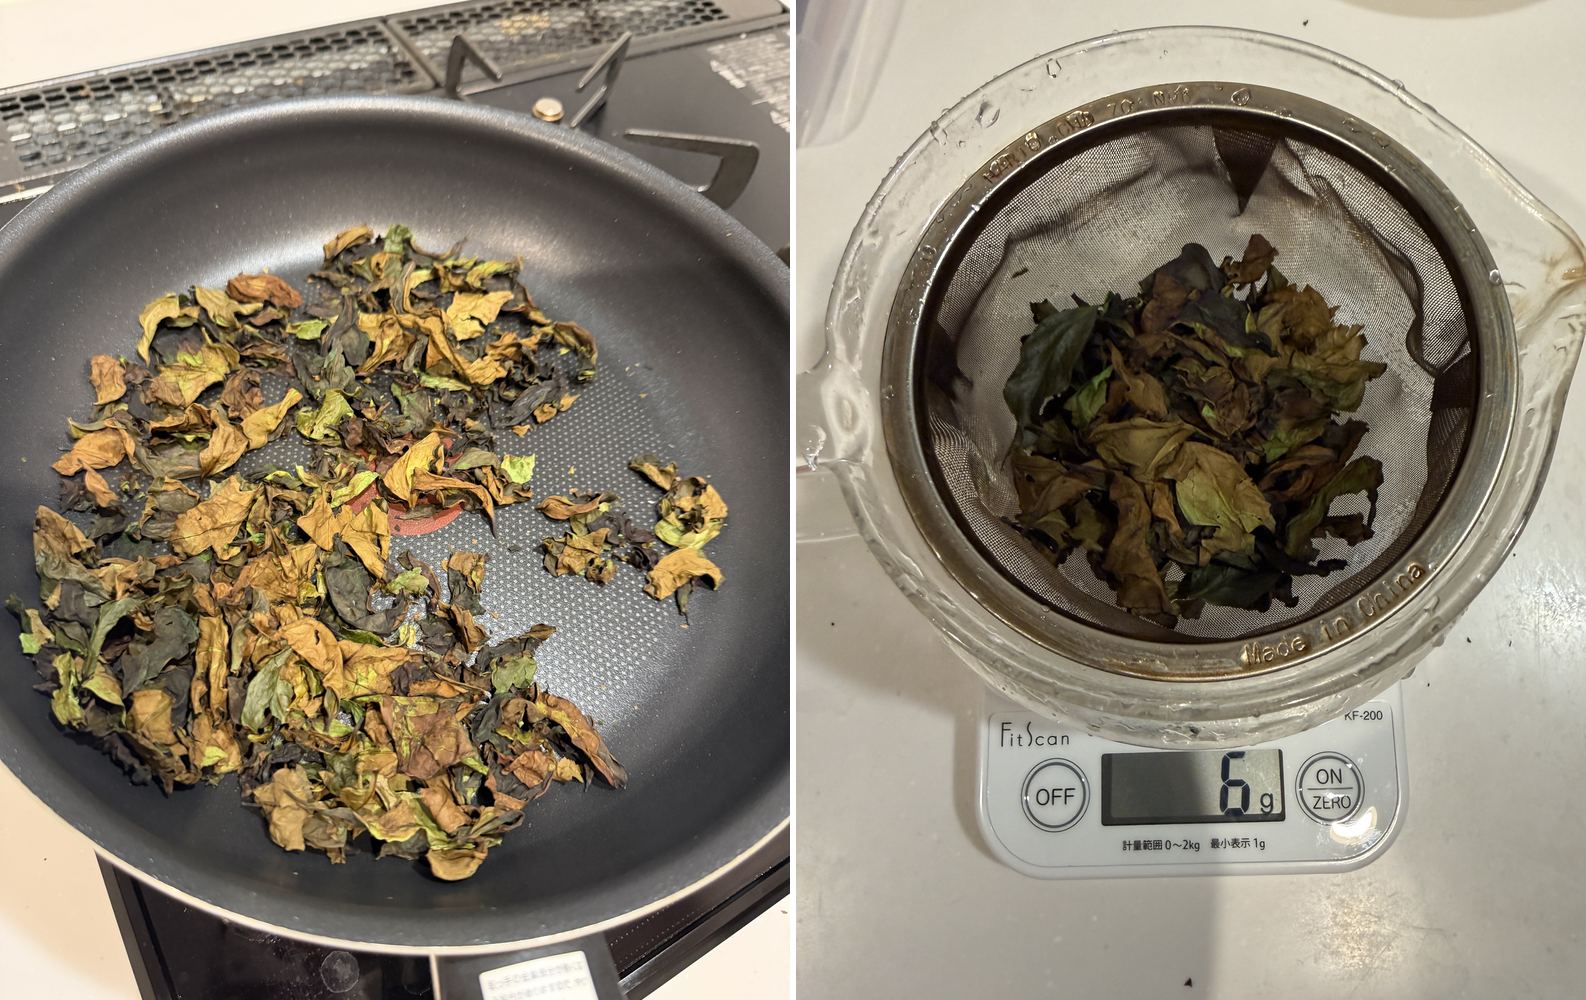
Weighing it: 75g of raw side shoots, with stems removed and roasted thoroughly, came out to 12g. Starting from the same 75g as attempt 1 (which yielded 39g), removing the stems and drying it further brought the final weight down to under a third. The much lower yield reflected both the removal of the stems and the greater amount of moisture driven off during roasting.
Brewing (attempt 3)
Since the last brew was weak, I extended the steeping time to 3 minutes this time. Conditions: 6g, 400ml, 3 minutes.
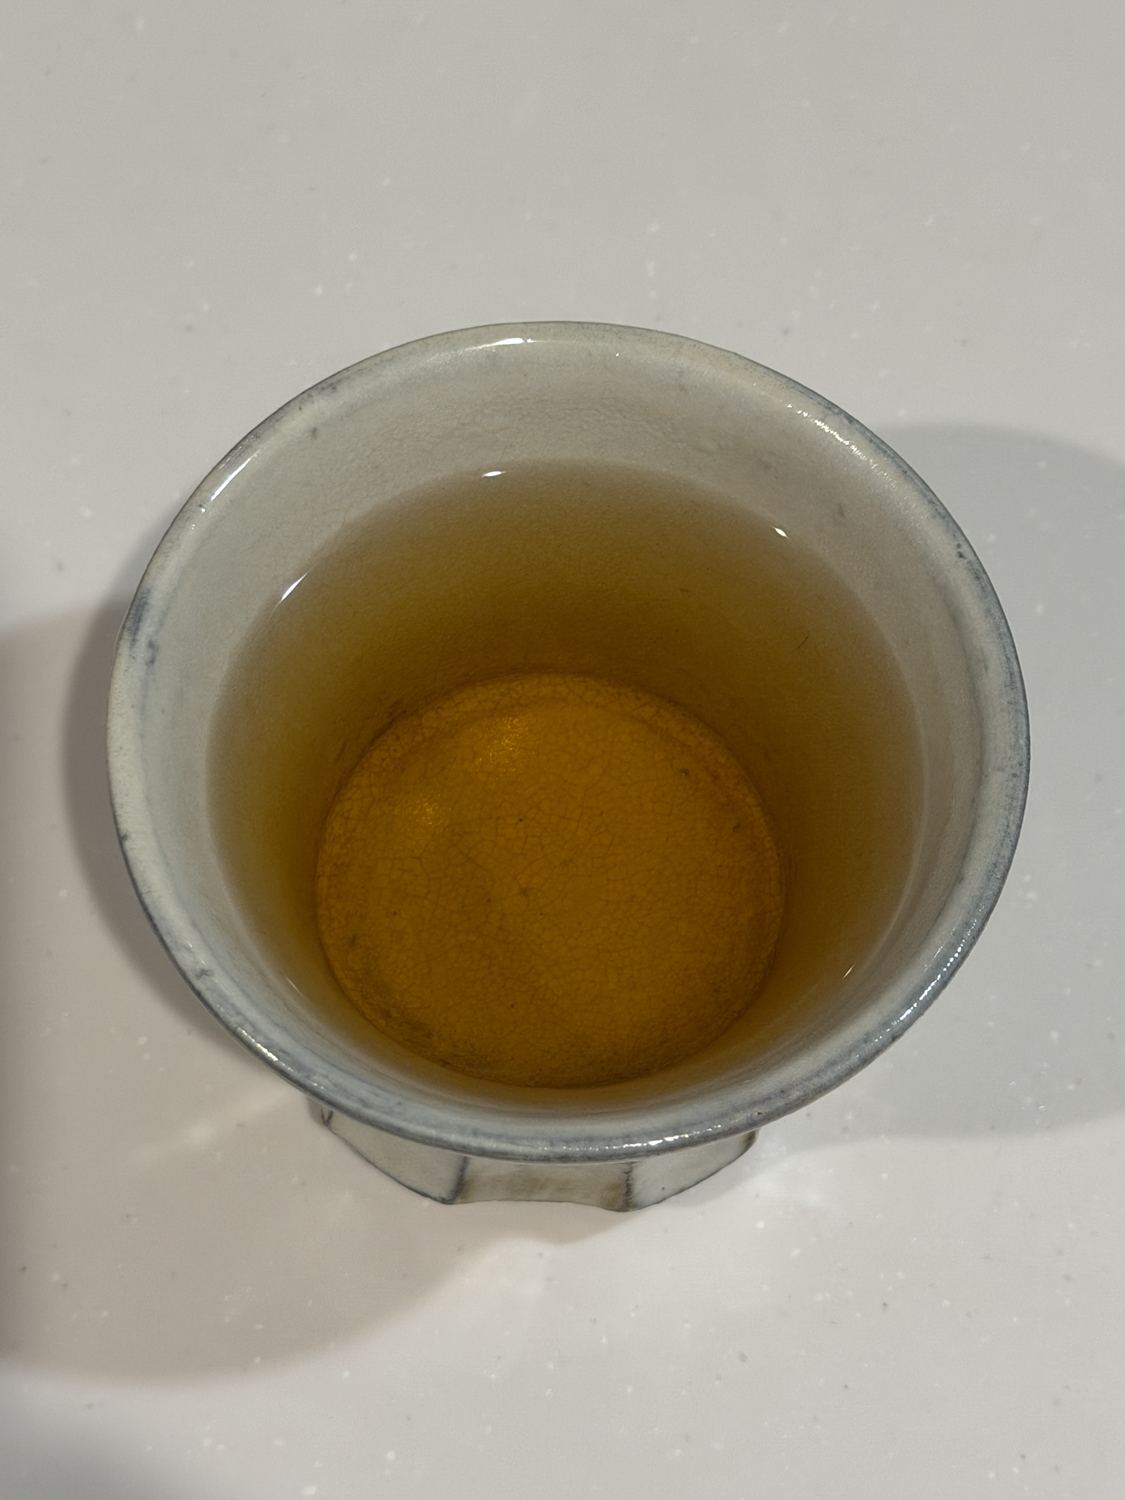
The result had even less of that off-flavor, moving closer to something like hojicha or black tea. The color had also gotten more amber and “tea-like” with each attempt — right in line with what Goto-san had said about darker roasts leaning toward hojicha.
Summary of all three attempts
| Attempt | Prep | Roast time | Brewing | Flavor assessment |
|---|---|---|---|---|
| 1 | Stems included, split in half | ~20 min | 6g / 400ml / 1 min | Grassy, herbal-tea-like. Wife: “ugh,” wry smile |
| 2 | Re-roasted attempt 1 | Additional time, low heat | 6g / 400ml / 1 min | Fully dried and crisp. “Like the fifth steep of Taiwanese tea” = weak |
| 3 | Stems removed, leaves torn by hand | Crisp at 15 min, done at 25 min | 6g / 400ml / 3 min | Less off-flavor, closer to hojicha/black tea |
What I learned, roughly summarized:
- In my first attempt, the lighter roast remained grassy and herbal. As Goto-san said, roasting more thoroughly removes the off-flavor and moves it closer to hojicha.
- Removing the stems helps the leaves roast more evenly and makes the roast easier to control.
- For this batch, a 1-minute steep was too weak. Once the leaves are well-dried, closer to 3 minutes extracts more fully.
- The moisture content varies leaf to leaf, so “crisp enough to snap with chopsticks” is a better indicator than a fixed number of minutes.
- Roasting thoroughly drops the yield significantly: starting with 75g of fresh side shoots, the lighter first attempt yielded 39g, while the deeper, leaves-only third attempt yielded just 12g. In this experiment, the better-tasting version also produced much less finished tea, partly because I removed the stems and drove off more moisture. You’ll need a decent volume of side shoots if you want to make more than a few servings.
The finished tea, and my wife’s verdict
I asked my wife, who had gone “ugh” after the first attempt, to try the third version. Her response:
“It’s not quite Japanese black tea (wakōcha) — more like… it has a sweet aroma, kind of like Taiwanese tea. It’s much better now.”
Starting from “ugh” in attempt 1, through “like the fifth steep of Taiwanese tea” (meaning: weak) in attempt 2, I finally arrived at “Taiwanese tea” meant as a compliment. The same phrase, but its meaning shifted from a comment on weakness to a comment on a pleasant, sweet aroma — that shift is honestly the most satisfying part of this whole experiment for me.
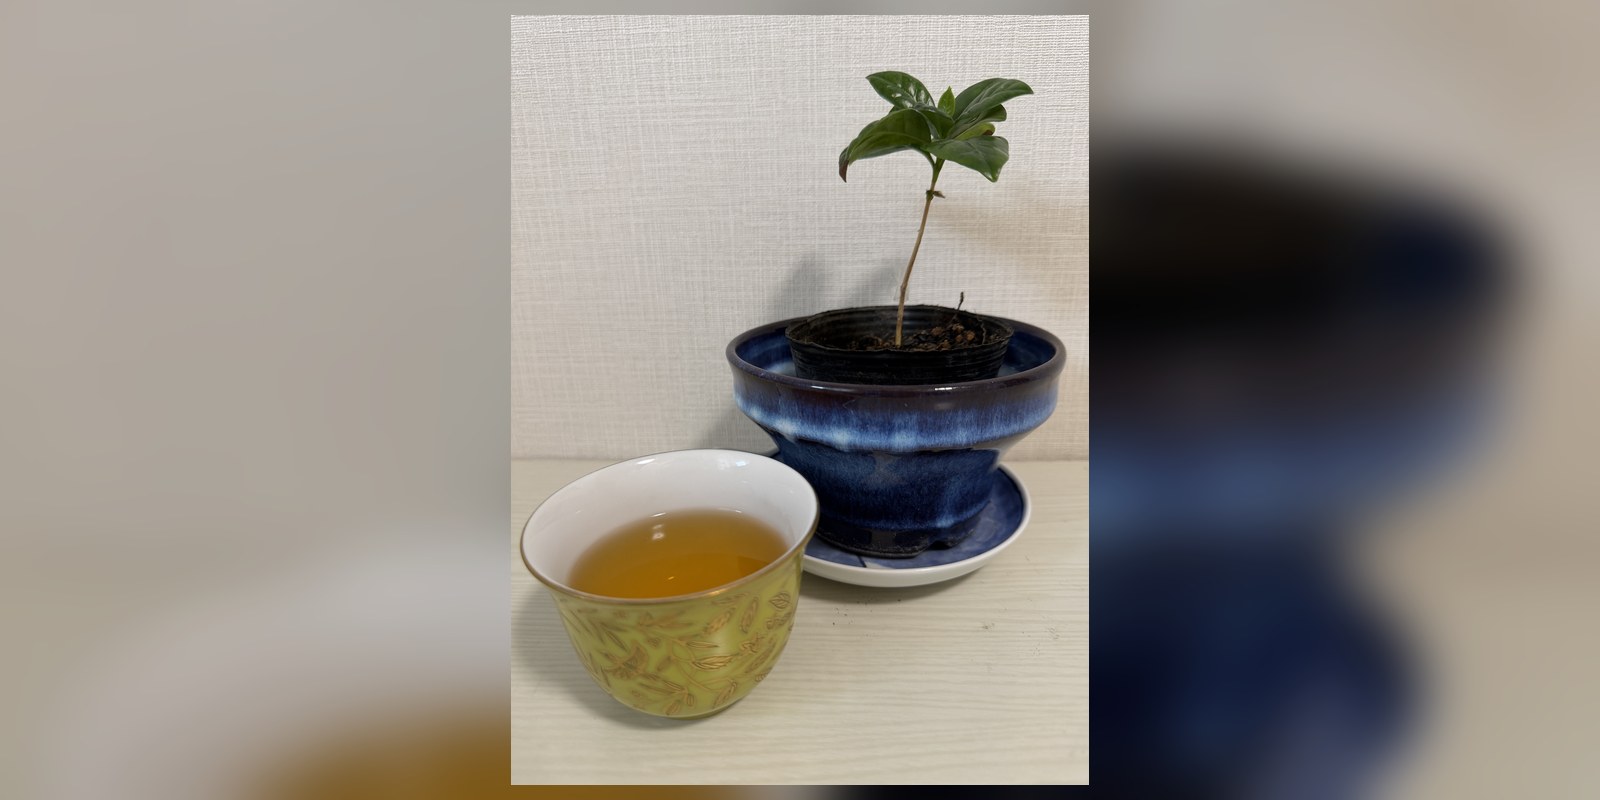
Roasting deeper to remove the grassiness, stripping the stems and evening out the leaves, and extending the steep time — these three adjustments got me to a tea I actually wanted to drink. The photo at the top of this article shows the finished tea alongside a coffee tree I’m growing at home.
What happens if you dry the leaves first? (To be tested next)
Looking into how coffee leaf tea is usually made, most recipes call for drying (air-drying in shade) the leaves before roasting. Naturally dried fallen leaves are said to be more aromatic than fresh leaves, closer to hojicha.
My approach this time was different: pan-roasting fresh side shoots directly, with no drying step. It still turned into a drinkable tea in the end, but a few questions remain:
- Would pre-drying shorten the pan-roasting time?
- Does drying reduce the grassy off-flavor more effectively?
- Does it change the flavor (aroma, sweetness) noticeably?
I won’t know without trying both. So next time, I’ll use a comparable batch of side shoots, dry them first, and compare the results with this no-drying method.
| Method | Prep | Approx. roast time | Flavor tendency |
|---|---|---|---|
| No drying (this time) | Roast fresh leaves directly | Longer (20–25 min) | Grassiness tends to remain → improves with a deeper roast |
| Drying (to be tested) | Air-dry half a day to a day, then roast | (to be added after testing) | (to be added after testing) |
There are plenty of “with drying” recipes online, but I haven’t found many articles that directly compare matched batches of leaves prepared with and without a drying step. This is exactly the kind of test I can run because I have regular access to fresh side shoots through Goto Coffee Farm — stay tuned for the follow-up.
Tools used
Pan, cooking chopsticks, a kitchen scale, a tea strainer, and a heatproof cup. Nothing special — just things I already had at home. What mattered more than the tools was roasting over low heat without scorching the leaves, and driving off the moisture thoroughly.
Final thoughts
My conclusion from this whole process: side-shoot coffee leaf tea is genuinely enjoyable once you dial in the roast. But it’s not as simple as “roast it and pour hot water over it.” It took:
- Roasting thoroughly to remove the grassiness
- Stripping the stems and using leaves only
- Steeping longer
…to finally get somewhere close to hojicha or black tea. I started from an “ugh” on attempt one, but having Goto-san’s early guidance — that it could be made into tea, roasted over low heat, and that a lighter roast leans herbal while a darker roast leans toward hojicha — kept me from losing direction along the way. Getting to “it has a sweet aroma, kind of like Taiwanese tea” by the end was a genuinely satisfying result.
By the way, the plant next to the tea in the photos is a coffee tree I’m growing from a supermarket-bought plant. New shoots have been coming in on it too, and I’ll be tracking its growth in a separate article. If you’re interested in following the “tree to cup” journey from a small houseplant, I hope the upcoming growth log will be useful — and perhaps one day I’ll be able to make tea from its side shoots too.
Related reading (growing and using a coffee tree, series)
This blog follows the theme of growing a coffee tree myself and using as much of it as possible — leaves and cherries both. Related articles below.
- How I became a coffee tree owner
- Introducing Goto Coffee Farm — the farm run by Goto-san, who gave the advice behind this article.
- Making tea from cascara (dried coffee cherry pulp) — what I tried before this side-shoot tea, using the fruit instead of the leaves.
- Growth log of a coffee tree bought at the supermarket: what happened to the plant in these photos (coming soon).
- My home roasting equipment — the tools I use to roast beans.